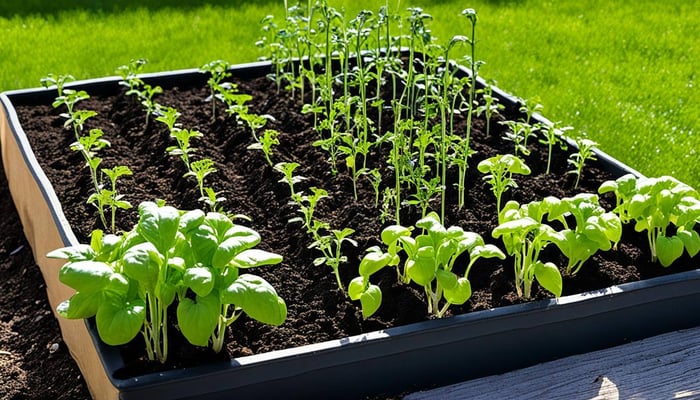

Did you know that a single square meter of garden space cultivated with vegetables can yield over five times the produce when started with indoor seedlings versus direct sowing? This staggering statistic speaks volumes about the impact of early spring seed starting on the productivity and efficiency of your growing season. As a seasoned gardener, I have experienced the profound difference that starting garden seeds indoors in February makes. It's a gateway to extend the garden's bounty and create a well-timed planting agenda. Are you wondering what seeds to start indoors in February?
By kicking off the growing season from the warmth of my home, I've managed to nurture delicate seedlings and prep them for the volatile temperament of early spring weather. This technique contributes to an earlier harvest and offers the plants a fighting chance against pests and diseases that prowl for young, vulnerable sprouts in the garden. Take it from me, understanding which vegetable seeds to coax into growth indoors as February's chill lingers outside is a chess move that rewards you with a garden abundant in both beauty and produce.
Key Takeaways
- Maximizing garden output by starting seeds indoors.
- Selecting the right seeds for early indoor sowing.
- Effectively extending your garden’s growing season.
- Benefits of early spring seed starting for plant health.
- Proper planning for a strategic and productive planting timeline.
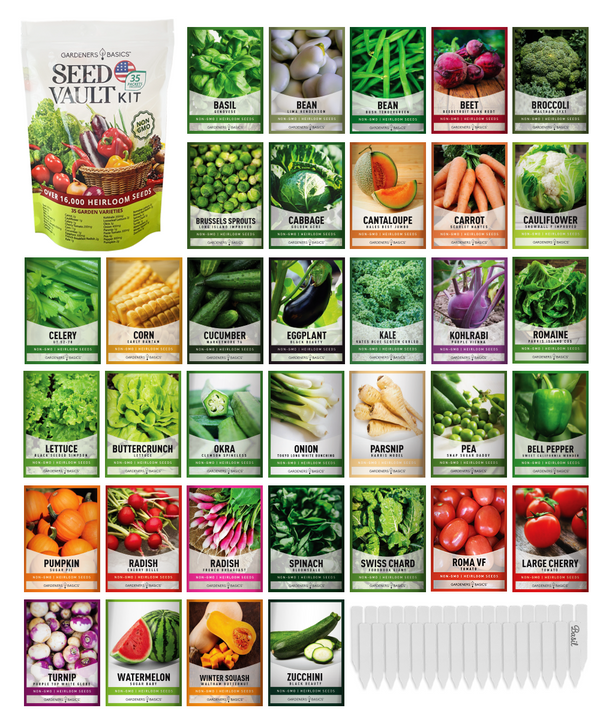
Vegetable Seed Vault Kit – 35 Heirloom Non-GMO Vegetable Seeds for Gardening & Survival Food Storage
$29.95
$49.95
Vegetable Seed Vault Kit – 35 Heirloom Non-GMO Vegetable Seeds The Vegetable Seed Vault Kit includes 35 heirloom, non-GMO vegetable seed varieties with over 16,000 seeds, making it a complete survival seed vault for home gardening, food security, and long-term… read more
Understanding the Seed Starting Timeline
As someone deeply invested in the success of my garden, I've learned that timing is everything. A crucial aspect of that timing involves marking the calendar meticulously for the weeks before your last frost date. This key moment in the agricultural clock dictates when I begin seed starting. It's a period of intense preparation where each day counts, and information is a valuable ally. To better illustrate this, let me walk you through a typical seed starting timeline and elaborate on why Gardeners Basics heirloom seeds for sale could be your best choice for this venture.
Understanding that seeds have different needs is foundational. Some vegetables benefit from a headstart, finding their vigor long before the soil outside is hospitable. Others require patience to be sown directly into the earth when right. Here's a glimpse at what an indoor start entails:
- Selection: The journey begins with choosing high-quality seeds. Opting for heirloom varieties from Gardeners Basics means starting with a robust genetic legacy, often equating to more flavorful, nutritious crops. These seeds are known for their adaptability to local growing conditions over time.
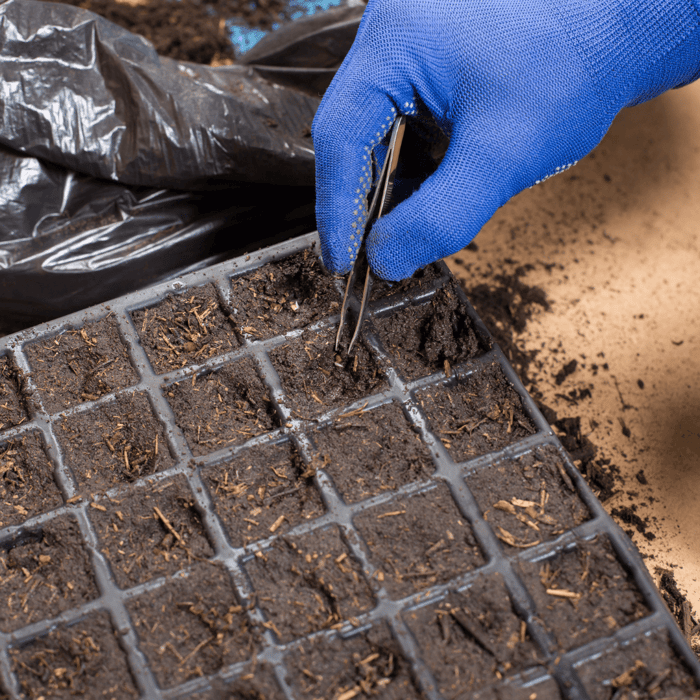
- Germination: With the right selections made, next comes germination. This is where a seed's life sparks, burgeoning into what will soon be a seedling. Attention to moisture and warmth is paramount, with each plant species having unique requirements.
- Growth: Post-germination is all about nurturing. The goal is steady growth, establishing the strength needed to survive the eventual move outdoors. This phase includes providing ample light and nutrients and maintaining an ideal microclimate, which can be challenging through fickle end-of-winter weather patterns.
- Hardening Off: Finally, as the outdoors beckon, the seedlings must acclimate. This involves exposing your infant plants to the elements progressively, a dance between the safety of the indoors and the untamed world outside your garden plot.
With these essential phases in mind, let's lay them out more systematically.
| Phase | Timeline | Actions |
|---|---|---|
| Selection | 8-10 weeks before the last frost | Choose Gardeners Basics heirloom seeds |
| Germination | 6-8 weeks before the last frost | Sow seeds indoors; Provide warmth and moisture |
| Growth | 4-6 weeks before the last frost | Ensure proper lighting; Begin fertilizing |
| Hardening Off | 1-2 weeks before the last frost | Gradually expose plants to outdoor conditions |
While this framework offers a generalized guideline, it is crucial to note that individual plant species may diverge slightly in their requirements. Nevertheless, these are the formative stages that all my seeds undergo, from their genesis to their eventual lush existence in my garden beds. Notably, having heirloom seeds for sale at Gardeners Basics has simplified my selection process—providing peace of mind that the seeds I start with are of the highest caliber.
I cannot overstate the importance of marking your calendars. Success often lies in the details, such as the specific last frost date of your locale. These varied aspects can make or break a harvest because, despite our best efforts, the rhythm of nature holds the ultimate trump card in the life of a gardener.
Essential Supplies for Starting Seeds Indoors
Every gardener's success begins with setting up the right foundation for their plants. As I delve into the essentials for indoor seed starting, you'll understand how having the right supplies can substantially influence your garden's output. Whether it's tomatoes or tulips, the indoor seed starting journey requires a few key investments, which will pay off in healthy and vigorous plants.
Seed Starting Containers
Firstly, the choice of containers is critical. They range from biodegradable pots, which can be planted directly into the soil later, to reusable plastic trays perfect for starting many seedlings. I carefully select size-appropriate containers to offer ample room for root growth without taking up unnecessary space. Here's a quick comparison of container types:
| Container Type | Pros | Cons |
|---|---|---|
| Biodegradable Pots | Eco-friendly, no transplant shock | More expensive can mold if too wet |
| Plastic Trays | Cost-effective, reusable | Requires careful transplantation |
| Peat Pellets | Convenient, minimal mess | Limited growth space, peat is not sustainable |
Quality Seed Starting Mix
A quality seed starting mix is next—the medium in which your seeds will come to life. I ensure the mix is light, sterile, and nutrient-rich to foster the best conditions for sprouting seeds. The right mix provides the delicate balance of moisture retention, aeration, and nutrients that fragile seedlings require during their early stages of growth.
Grow Lights and Heat Mats
Grow lights and heat mats are indispensable tools in my seed-starting arsenal. Adequate lighting is crucial for developing strong, stocky plants—so I invest in quality grow lights to simulate the full spectrum of sunlight. On the other hand, heat mats gently warm the soil, encouraging faster and more consistent seed germination, especially for warm-season crops requiring higher temperatures. Below is a brief overview of the significance of each:
| Supply | Importance | My Recommendation |
|---|---|---|
| Grow Lights | Prevents legginess and strengthens plants | Full spectrum LED lights |
| Heat Mat | Improves germination rate | Durable, waterproof mat with adjustable temperature |
By ensuring these essentials are part of my seed-starting toolkit, my indoor gardening efforts yield ready and robust plants for the transition to the outside world. Seed starting is both an art and a science; with the right equipment, it's a thoroughly rewarding venture.

Best Vegetables to Start Indoors in February
February may be cold and gray outside, but inside, it marks the perfect time for me to give my garden a head start. When I aim to select the plants to grow that will flourish when spring fully awakens, I focus on starting seeds indoors that benefit from the early initiation. The cozy confines of my home become a nursery for an assortment of leafy greens, brassicas, and cool-season vegetables. These selections promise a lush and prolonged growing season that rewards me with abundant harvestable goods.
To sustain my yearly tradition of a bountiful garden, I stress the importance of a structured plan, especially when giving certain veggies the early advantage they require. With this in mind, I am delighted to share an inclusive list of vegetables that significantly benefit from being started indoors during the chilly month of February:
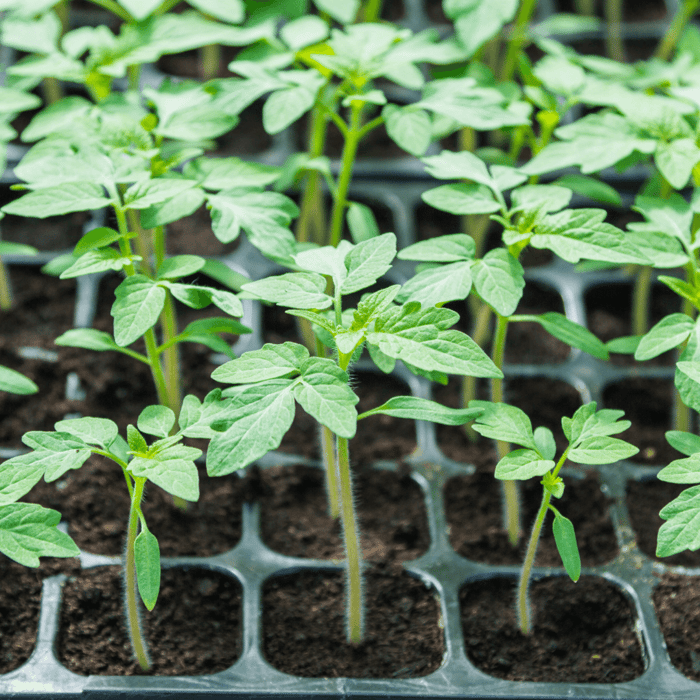
- Tomatoes: Arguably, the garden stars; tomatoes require a warm start, making early indoor sowing an indispensable step.
- Peppers: From the sweet bells to the fiery chilis, peppers take time to develop from seedlings into fruit-bearing plants.
- Eggplants: These heat-loving nightshades thrive when given a lengthy head start within my nurturing indoor space.
- Broccoli: Notorious for their preference for cool weather, broccoli seedlings work best when started indoors and then transplanted.
- Kale: This hardy green adapts well to outdoor spring conditions and enjoys the early start away from harsh outside elements.
Their shared need for a well-timed and nutrient-rich launch into life ties these varied plants together. For these plants to grow and thrive, the early start indoors is not merely a suggestion but a vital requirement.
Below is a detailed table that outlines each vegetable, its indoor starting time relative to the last frost date, and the benefits of this early sowing method:
| Vegetable | Start Time Before Last Frost | Benefits of Starting Indoors |
|---|---|---|
| Tomatoes | 6-8 weeks | Earlier fruit set and extended harvest |
| Peppers | 8-10 weeks | Optimal growing period for full development |
| Eggplants | 8-10 weeks | Prevents delays in fruiting due to cold soil |
| Broccoli | 7-9 weeks | Ensures robust plants capable of withstanding transplant |
| Kale | 3-5 weeks | Produces sturdy seedlings ready for early spring growth |
Starting seeds indoors has always been a practice close to my heart. It instills in me a sense of anticipation for the upcoming growing season and enables me to guide and nurture my plants from the very beginning. This intimate knowledge of their growth stages ultimately leads to a garden that's not only plentiful but also reflective of the meticulous care invested throughout the year.
Starting Perennial Flowers Indoors
When the chill of early spring still graces the air, I take solace in my indoor garden sanctuary, commencing the cultivation of perennial flowers. Sowing seeds indoors is a proactive step offering several compelling benefits for these enduring blooms. By starting perennials from seed in the controlled environment of my home, I'm laying the foundation for sturdy plants that emerge in the garden with vibrant colors and vitality.
Perennial flowers are the backbone of a dynamic garden, returning year after year with minimal intervention. The advance of planting these seeds indoors cannot be overstated—strength, resilience, and an extended floral display. Here are some of my go-to perennial varieties that stand out, especially when given the early start advantage:
- Achillea produces a plentiful array of starry flowers, attracting pollinators and bringing life to the garden.
- Lavandula, or lavender, charms with its calming fragrance and stunning purple hues.
- Echinacea, commonly known as coneflower, is visually appealing and a fortifier for the immune system.
- Rudbeckia catches the eye with its bright yellow petals and prominent dark centers.
- Sedum, with its succulent leaves and clusters of flowers, adds unique texture and interest.
Adhering to the individual needs of each species, from soil composition to light exposure, I find starting these seeds indoors in February yields the highest success rate. When temperatures stabilize, it allows for a gradual but enthusiastic transition to the garden beds.
Consider the Achillea, which performs exceptionally well when started indoors six to eight weeks before the last frost. The subsequent seedlings develop robust root systems eager to anchor into the garden soil. Likewise, the Rudbeckia, when given this early upbringing, unfolds into rich, sun-facing blossoms ready to stand tall against the summer's heat.
As timeless as these perennials are, their initiation into the world is delicate. The quiet wait of indoor germination grants me the pleasure of witnessing the first signs of life—a green sprout-breaking soil—not just as a gardener but as a caretaker. When these perennial flowers are mature enough to be introduced outdoors, they are more than mere plants; they are stories and chapters of my garden's enduring legacy.
Tapping into the potential of perennial flowers by starting them indoors during the early spring reinforces my connection to the growth cycle. It's a practice steeped in patience and foresight, proving that the richest gardens are not just sown but thoughtfully nurtured from the beginning.
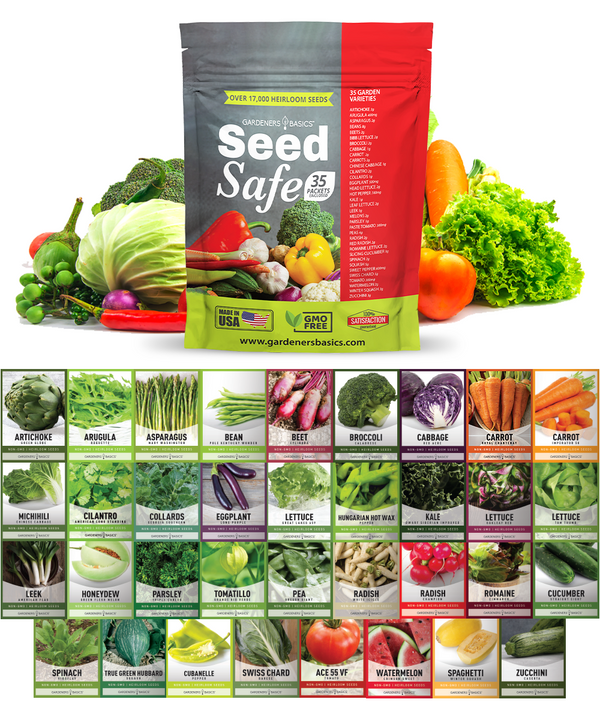
Seed Safe Survival Seed Kit - 35 Variety Pack
$29.95
$49.95
Seed Safe Survival Seed Kit: The Ultimate Heirloom Collection for Self-Sufficient Gardening Introducing the Seed Safe - 35 Varieties of Heirloom Vegetable, Herb, and Fruit Seeds, the ultimate solution for gardeners who want to secure a bountiful future harvest. This… read more
When to Start Different Types of Brassicas
As the season transitions, the timely germination and nurturing of brassicas—like broccoli, cauliflower, and Brussels sprout can be a testament to a gardener's foresight. The seed-starting process for these nutrient-dense crops begins indoors, where the controlled climate can facilitate optimal growth. Let me guide you through the ideal sowing times and methods for these vegetables to ensure your garden is at its productive peak during the growing season.
Broccoli and Cauliflower
Beginning with broccoli and cauliflower, starting seeds indoors 7 to 9 weeks before the last frost date will afford them the time to establish a robust root system and leafy growth. Here's an insider tip: maintaining a temperature around 65-70°F (18-21°C) during germination maximizes their growth potential.
Brussels Sprouts
Given their lengthy maturation period, achieving a bountiful harvest of Brussels sprouts requires an early and durable start. Plant their seeds indoors 6 to 10 weeks before the last frost. These fledglings will thrive in temperatures similar to those of broccoli and cauliflower. Once germinated, avoid the rookie error of over-watering by letting the soil dry slightly between each watering, which promotes sturdy stem development.
| Type of Brassica | Sowing Window (weeks before the last frost) | Germination Temperature (°F) | Germination Temperature (°C) |
|---|---|---|---|
| Broccoli | 7-9 | 65-70 | 18-21 |
| Cauliflower | 7-9 | 65-70 | 18-21 |
| Brussels Sprouts | 6-10 | 65-70 | 18-21 |
Following these guidelines for broccoli, cauliflower, and Brussels sprouts supports their development and leads to healthier transplantings and more abundant yields. Adequate light, consistent moisture, and the right soil mix are the allies of every seed during these early stages. Remember, the harvest you dream of begins with the seeds you start today.
Timing for Tomato and Pepper Seeds
As a gardener who takes the seed starting timeline seriously, I always consider the perfect timing for sowing my favorite crops: tomatoes and peppers. Grasping the nuances of when to start these popular garden vegetables is essential for maximizing the bountiful harvest that awaits. With the right approach to pepper seeds and tomato seeds, a well-planned timeline ensures these warmth-loving specimens reach their full potential.
Preparing Pepper Seeds for Germination
When it comes to pepper seeds, precision in preparation is key. Pepper seeds can sometimes be slightly stubborn during germination, so I like to begin with a pre-sowing soak. Soaking the seeds in warm water for up to 8 hours helps soften the seed coat and commences the germination process. While some might skip this step, I've found it to be a game-changer—a catalyst that speeds up germination significantly.
- Sowing pepper seeds: Approximately 8-10 weeks before the last expected frost.
- Soaking: Immersing seeds in warm water for about 8 hours before planting.
- Germination Environment: Pepper seeds favor a germination temperature of about 80°F (27°C) – a heat mat often becomes my ally here.
Ensuring these pepper seeds are snug in a well-draining starting mix afterward, placed under a grow light, and given the right moisture levels leaves me confident of the emergence of strong, vital seedlings ready for transplanting in due course.
Giving Tomato Seeds a Warm Start
Tomato seeds enjoy the warm embrace of indoor seed starting. Commencing this process 6-8 weeks before the final frost gives them the cozy start they require. With a consistent temperature between 70°F-80°F (21°C-27°C), tomato seeds uniformly sprout, ready to grow into robust plants that offer up a cascade of juicy fruits.
| Action | Timeframe | Temperature | Notes |
|---|---|---|---|
| Starting Tomato Seeds | 6-8 weeks before the last frost | 70°F-80°F | Maintain consistent warmth for optimal germination |
| Transplanting Seedlings | After the last frost | Outdoors | Ensure seedlings are hardened off before transplanting |
Whether it's the succulence of cherry tomatoes or the hearty flesh of beefsteaks, my seeds receive diligent monitoring and warmth—guided by the understanding that nurturing these tiny seeds indoors during cold February promises a summertime reward of homegrown tomatoes on my plate.
Through years of experience, I’ve found that gently nurturing pepper and tomato seeds under these detailed conditions provides a profound advantage. From the careful planting to balancing the moisture and temperature, I set forth a foundation for a garden that will resonate with the colors, textures, and flavors of these two cherished edibles. There is a certain joy in watching these seeds, once so delicately placed in their soil beds, transform into plants laden with fruits under the summer sun—a joy made possible by the precise timing and care given during these early stages.
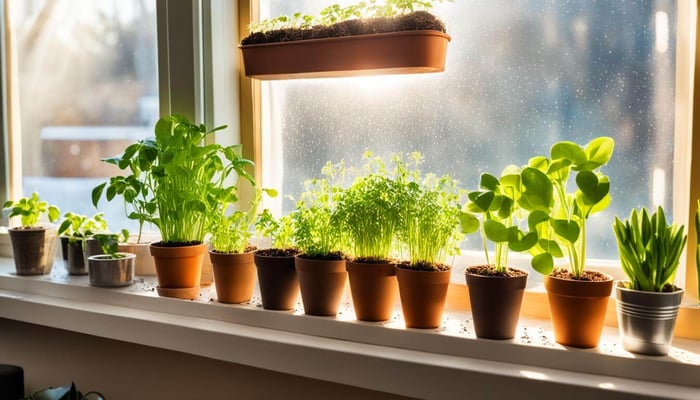
Advantages of Starting Leafy Greens Indoors
Embracing the stillness of February to begin the process of sowing seeds indoors has long been a tradition in my gardening routine, especially regarding leafy greens. This early maneuvering within the sanctuary of my home leads to an extended season, enabling me to reap the benefits of harvests well before those who directly sow. In this section, I unravel the advantages of starting leafy greens indoors and reveal which varieties tend to favor this method.
Initiating growth indoors is not just about gaining a head start; it's about maximizing the quality and duration of your leafy green harvest. The control I gain over the environment—temperature, moisture, lighting—cultivates resilience in the young plants, which serves them well when they brace the outdoors. A critical component is the carefully orchestrated early spring planting, scheduled so that these seedlings find the transition to the outside world smoother and less jarring.
Let's discuss which leafy green varieties excel when given the sheltered start:
- Spinach is a champion of the cold, yet starting it indoors allows me to safeguard it from the harshest frosts and gives me a productive crop early in the season.
- Lettuce, with its myriad of types, benefits greatly from initial indoor planting, resulting in earlier and often more bountiful salad greens.
- Swiss chard is another favorite; its colorful stems add hue to the garden early on, thanks to its extended growing cycle from an indoor start.
Growing these greens indoors before their transfer to the garden is equally important. Managing this journey involves a tactical approach towards lighting—ensuring these light-loving plants receive sufficient rays, whether natural or from a well-placed grow light. Materializing this early growth also means regular monitoring of soil moisture and careful hardening off when the time transpires for outdoor transplanting.
| Leafy Green Variety | Indoor Starting Timeframe | Indoor Care Tips | Outdoor Transplanting Period |
|---|---|---|---|
| Spinach | 6-8 weeks before the last frost | Maintain soil moisture, avoid overwatering | As soon as soil can be worked in spring |
| Lettuce | 4-6 weeks before the last frost | Ample light; avoid nutrient-rich soil to prevent leggy growth | After the threat of frost has passed |
| Swiss Chard | 5-7 weeks before the last frost | Regular watering ensures bright, indirect light | Two weeks after the last frost date |
As a gardener, there's an inherent joy in nurturing the growth of my green leafy vegetables from seed to harvest. Starting them indoors during the cold month of February is not merely a strategy; it's an art form, melding attention and anticipation into tangible results. With each season, I'm grateful for the lush, extended yields that this method consistently provides—proof that the labor of love infused in the earliest stages of planting comes to fruition in the most splendid ways.
Utilizing Grow Lights and Heat Mats Effectively
As I embark on the annual ritual to start seeds indoors, I turn to my trusty companions—grow lights and heat mats. These tools are not mere accessories but indispensable elements that mimic the nurturing embrace of the sun's rays and the earth's warmth. I’ve honed methods to deploy grow lights and heat mats, ensuring my seedlings emerge vigorous and ready for their eventual transition outdoors.
Choosing the right grow lights is the cornerstone of my indoor setup. I prefer full-spectrum LED grow lights for their energy efficiency and ability to balance cool and warm light, replicating the natural solar spectrum. Installing these lights above the seed trays is crucial; I maintain a distance close enough to prevent legginess yet far enough to avoid overheating the tender shoots.
The same meticulous approach governs using the heat mat, a device designed to gently warm the soil and promote consistent seed germination. The heat mat is especially beneficial for warm-season crops that demand higher germination temperatures. I always opt for a model with adjustable settings, as this allows me to tailor the warmth to the specific needs of each seed variety I cultivate.
Let me share with you a table that reveals my strategic approach to using these implements:
| Tool | Function | Placement | Duration of Use |
|---|---|---|---|
| Full Spectrum LED Grow Light | Provides the full range of light spectrum for photosynthesis | 2-4 inches above seedlings | 12-16 hours per day |
| Heat Mat | Ensures soil is at optimal temperature for germination | Under seed trays | Until germination, then as needed |
Timing is everything when it comes to these tools. The grow lights shine upon my seedlings, simulating the long sunny days of summer. I maintain a schedule, keeping the lights on for 12-16 hours per day, which aligns with the natural rhythm of daylight hours during peak growing season. To maintain this schedule effortlessly, I use a timer that automates the lights’ on-and-off cycle.
As for the heat mat, I place it under my seed starting trays, observing the delicate dance of temperature adjustment. The seedlings benefit from this added warmth until germination occurs. If ambient temperatures are sufficient, I remove the heat source, avoiding the risk of stifling the natural growth instincts that prepare them for outdoor conditions.
Such attention to detail in setting up a robust indoor growing environment lays the foundation for healthy, resilient plants. My grow lights and heat mats have become precision instruments, allowing me to shepherd these seeds through their most vulnerable phase with a gardener’s touch.
Hardening Off Seedlings for Early Spring Planting
Hardening off is a critical and indisputable step when transitioning seedlings from the cozy confines of indoor germination to the vast outdoors. Each year, my anticipation grows as I ready my young plants for the crucial move outside, in sync with the rhythm of early spring planting. This period calls for a gradual introduction to the external elements, preparing the plants for a successful transition without the shock that could halt their growth.
Understanding the Hardening-Off Process
The hardening-off process begins with monitoring the weather and choosing a week of mild conditions. Over approximately 7-10 days, my seedlings are introduced to the outside world, a few hours at a time. Each day, the duration extends, slowly exposing them to more sunlight, wind, and temperature fluctuations. On the first day, they might spend only 2-3 hours in a shaded and sheltered spot, but by the end of the week, they will have experienced full days outdoors, including direct exposure to sunlight and the cooler night temperatures of spring.
Using a Row Cover for Transitional Protection
Employing a row cover offers an extra layer of security for my seedlings against pests and erratic spring weather. The cover functions as a physical barrier without depriving the plants of the essential sunlight and rainwater they need. Additionally, the row cover maintains a more consistent microenvironment by moderating temperature spikes and shielding the plants from harsh wind gusts. This interim protection is crucial when temperatures unexpectedly drop, or a late frost threatens the tender life I've nurtured.
| Day of Hardening Off | Duration Outside | Conditions | Protection Used |
|---|---|---|---|
| Day 1-2 | 2-3 hours | Shaded, Sheltered | None |
| Day 3-4 | 4-5 hours | Partial Sun | Row Cover (if needed) |
| Day 5-6 | 5-6 hours | Mild Wind Exposure | Row Cover |
| Day 7+ | Full Day | Direct Sun & Night Exposure | Row Cover (remove daily) |
When the hardening-off period concludes, my seedlings are prepared for the permanent shift to their growing spaces. Using a row cover, I have an added assurance against unforeseen elements. The fruits of this detailed labor become evident as the plants establish themselves confidently in my garden, unfazed by the outdoor environment because they were introduced to it methodically. That initial care promises a hearty yield during early spring planting, just as nature intends.
Conclusion - What Seeds to Start Indoors in February
As we wrap up this guide on seed starting for an advantageous growing season, I hope the insights from my gardening adventures have enlightened and inspired you. I have emphasized the profound importance of beginning seeds indoors in February—a practice that significantly lengthens the growing season and maximizes the potential yields of your garden. The heirloom seeds offered by Gardeners Basics are not just seeds but promises of abundance; they are the underpinnings of a well-curated garden, bringing a wealth of genetic diversity and resilience that every gardener appreciates.
Through discussions about the right tools, the timing for various plants, and the careful process of hardening off seedlings, I aim to equip you with the knowledge and the confidence to take your garden to its productive zenith. By presenting options such as vegetables, perennial flowers, and essential brassicas, your garden could stand as a testament to the value and success derived from indoor seed starting. Allow the tapestry of your garden to be woven with the vibrant threads of heirloom varieties, each plant a brushstroke of your dedication as a gardener.
May your hands be soiled with the joy of planting and your heart uplifted by the fruits of your labor. With seeds from Gardeners Basics, let your growing season be extended, your gardens flourish, and your spirit be gratified. Here's to embracing the timeless art of seed starting and experiencing a harvest that is not just bountiful but inherently fulfilling. Happy gardening!
Ultimate Survival Seed Kit: 140 Varieties for Self-Sufficient Gardens & Food Storage
$99.95
$179.95
Ultimate Survival Seed Kit – 140 Variety Pack for Self-Sustaining Gardens, Long-Term Food Storage & FREE Ammo Can for Secure Storage Introducing the Ultimate Survival Seed Kit — your all-in-one solution for sustainable gardening, survival prepping, and self-sufficient living! This… read more
FAQ - February Seed Starting
What seeds should I start indoors in February for early spring planting?
In February, focus on starting vegetables like leafy greens, brassicas (such as broccoli, cauliflower, and brussels sprouts), and perennial flowers that benefit from an early start. Also, consider sowing tomato and pepper seeds indoors for a head start on the growing season.
How do I determine the right timeline for seed starting indoors?
Look up the last frost date for your area and count back the number of weeks as recommended for each plant variety, which is usually stated on the seed packet. This timeframe considers the optimal period for planting seeds indoors to ensure your seedlings are ready for transplanting at the appropriate time in spring.
What essential supplies do I need for starting seeds indoors?
You'll need seed starting containers, a high-quality potting mix, possibly grow lights, and a heat mat. A good potting mix is crucial for healthy root development. At the same time, growing lights and heat mats can improve germination rates and foster strong seedling growth, especially for light-loving and heat-dependent species like peppers and tomatoes.
Which vegetables are best to start indoors in February?
Vegetables ideal to start indoors in February include various leafy greens, broccoli, cauliflower, brussels sprouts, and other brassicas. Doing so gives these cool-season vegetables a significant head start, resulting in an extended harvest period.
Why should I start perennial flowers indoors in February?
Starting perennial flowers indoors during winter allows for a longer growing season, ensuring the plants are strong and established enough to bloom in the coming spring or summer. It also increases the chance of survival and establishment in the garden, compared to direct sowing outdoors later in the season.
When is the best time to start brassicas like broccoli and cauliflower indoors?
Broccoli and cauliflower seeds should be started indoors 6-8 weeks before your last frost date. This allows the seedlings enough time to develop into sturdy plants that can be transplanted after the danger of frost has passed.
How should I prepare pepper seeds for germination?
Pepper seeds often benefit from a heat mat to maintain the soil temperature at around 70-80°F, which promotes better and faster germination. Some gardeners also pre-soak seeds or lightly sand them to help break seed dormancy.
What's the best way to give tomato seeds a warm start?
Tomato seeds germinate best in warm soil, so placing your seed starting trays on a heat mat set to around 70-80°F can create an ideal environment. Once germinating, ensure they receive plenty of light from a sunny windowsill or grow lights to prevent leggy growth.
What are the advantages of starting leafy greens indoors?
Starting leafy greens indoors protects them from harsh weather conditions and pests. It also leads to earlier harvests, allowing you to enjoy multiple plantings and harvests within a single growing season.
How do I use grow lights and heat mats to start seeds indoors?
Set up grow lights to hang a few inches above the seedlings, raising them as the plants grow to prevent scorching. Use heat mats under your seed trays to ensure consistent warmth, particularly for warmth-loving plants. Monitor the soil moisture and temperature regularly to provide the best conditions for your seeds.
What is the process of hardening off seedlings for early spring planting?
Hardening off involves gradually acclimating indoor-grown seedlings to outdoor conditions. Start by placing seedlings outside in a sheltered spot for a few hours daily, slowly increasing their exposure to sun and wind over a week or two. This process reduces transplant shock and prepares the plants to transition to the garden.
Can I use a row cover during the hardening-off process?
A row cover can provide transitional protection for seedlings during the hardening-off process. It helps to moderate temperature fluctuations and protects the young plants from strong winds and intense direct sunlight while they acclimate to outdoor conditions.
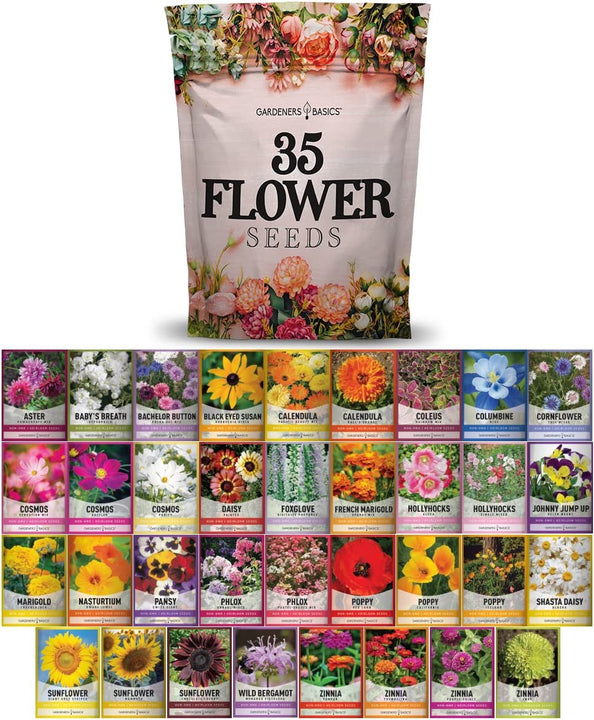
Wildflower, Perennial, & Annual Flower Seed Kit | 35 Variety Pack
$29.95
$49.95
35 Flower Seeds Variety Pack – Heirloom, Non-Hybrid, Non-GMO, Open-Pollinated – Perfect for Pollinator-Friendly Gardens Transform your garden with our 35 Flower Seeds Variety Pack, offering a stunning and diverse selection of heirloom, non-hybrid, and non-GMO seeds. Each variety in… read more