
Okra is often used in southern dishes. It is delicious and much easier to grow than you might think! Come explore how to grow okra from seed for your home garden.
How Long Does It Take for Okra Seeds to Germinate?
Okra is a warm-season vegetable that is grown for its edible pods. Growing okra from seed is a simple and rewarding process, but it is essential to know how long it takes for the seeds to germinate. Let's talk about how long okra seeds can germinate and what factors affect germination time.
Germination Time
Okra seeds typically germinate between 7 and 14 days, depending on the temperature and humidity. If the soil temperature is warm and the humidity is high, the roots will grow more quickly. Conversely, germination may take longer if the soil temperature is cool or the humidity is low.
Clemson Spineless Okra Seeds

$2.49
Clemson Spineless Okra Seeds - Heirloom, Non-GMO, Non-Hybrid, Open-Pollinated for Your Garden Discover the timeless appeal of Clemson Spineless Okra seeds, a must-have addition for gardeners looking to grow a bountiful harvest of tender, flavorful okra pods. Our premium seeds… read more
Factors That Affect Germination Time
Several factors can affect the germination time of okra seeds. Some of these factors include:
- Soil temperature: Okra seeds prefer warm temperatures of around 70°F to 95°F. If the soil temperature is too cool, the seeds may not germinate or take longer.
- Soil moisture: Okra seeds require adequate moisture to germinate, but the roots may rot before growing if the soil is too wet.
- Soil quality: Okra seeds require well-draining soil rich in organic matter. If the soil is too heavy or compacted, the sources may not be able to germinate properly.
- Seed quality: High-quality okra seeds will have a higher germination rate than low-quality seeds. Purchasing seeds from a reputable supplier ensures the best possible germination rate.
Tips for Promoting Germination
Providing the roots with optimal growing conditions is essential to promote the germination of okra seeds. Here are some tips to help you encourage germination as you learn how to grow okra from seed:
- Soak the seeds in water for 24 hours before planting to help soften the seed coat and promote faster germination.
- Plant the seeds in well-draining soil that is rich in organic matter.
- Water the seeds regularly to keep the soil moist but not waterlogged.
- Keep the soil temperature warm and humid using a heat mat, or cover the seeds with a plastic dome.
- Use high-quality seeds from a reputable supplier to ensure the best possible germination rate.
By following these tips, you can ensure the successful germination of your okra seeds and grow healthy, productive plants.
What is the Best Time of Year to Plant Okra Seeds?
Okra is a warm-season vegetable that thrives in hot, humid weather. To ensure a bountiful harvest, it is essential to plant okra seeds at the right time of year. Find out the best time of year to plant okra seeds and give other tips for growing this delicious vegetable.
Choosing the Right Time to Plant
The best time to plant okra seeds is in the spring, once the weather has warmed up and there is no longer a risk of frost. In most regions, this means planting in late April or early May. It is essential to wait until the soil temperature has warmed to at least 70°F, as okra seeds will not germinate in excellent soil.
In warmer climates, okra can also be planted in the summer or early fall. However, it is essential to avoid growing during the hottest part of the summer, as the plants may suffer from heat stress.
Vegetable Seed Vault Kit – 35 Heirloom Non-GMO Vegetable Seeds for Gardening & Survival Food Storage

$29.95
$49.95
Vegetable Seed Vault Kit – 35 Heirloom Non-GMO Vegetable Seeds The Vegetable Seed Vault Kit includes 35 heirloom, non-GMO vegetable seed varieties with over 16,000 seeds, making it a complete survival seed vault for home gardening, food security, and long-term… read more
Growing Okra from Seedlings vs. Seeds
While okra can be grown from seedlings, it is recommended to start with seeds to ensure strong and healthy plants. Okra seeds can be started 4-6 weeks before the last frost date indoors, then transplanted into the garden once the soil has warmed up.
If you choose to use seedlings, plant them in the ground carefully, ensuring the roots are not damaged. Plant seedlings at the same depth they were buried in their containers and water them well.
Tips for Growing Okra Successfully
In addition to planting at the right time of year, there are several other tips for growing okra successfully:
- Choose a sunny location with well-draining soil that is rich in organic matter.
- Space plants 18-24 inches apart to ensure good air circulation.
- Water regularly, but avoid overwatering or letting the soil become waterlogged.
- Fertilize with a balanced fertilizer every 3-4 weeks.
- Mulch around the base of the plants to conserve moisture and suppress weeds.
- Watch for pests and diseases and take appropriate measures to control them.
Okra is a delicious and nutritious vegetable easy to grow from seed. By planting at the right time of year and following these tips for successful growth, you can enjoy a bountiful harvest of fresh, flavorful okra all season long.
How Deep Should Okra Seeds Be Planted?
One of the most critical factors in growing okra from seed is planting the seeds at the correct depth. We need to discuss how deep okra seeds should be produced and why getting the depth just right is essential.
Planting Depth for Okra Seeds
Okra seeds should be planted about 1 inch deep in well-draining soil. Plant the seeds about 2-3 inches apart, and thin out weaker seedlings to ensure proper spacing.
It is important to avoid planting okra seeds too deep, as this can prevent them from germinating properly. If the roots are planted too shallow, they may dry out or become dislodged by heavy rainfall or strong winds.
Why Planting Depth is Important
Planting depth is significant because it affects the germination rate and the seedling's strength. If okra seeds are planted too deep, they may struggle to germinate and cannot push through the soil to reach the surface.
On the other hand, if the seeds are planted too shallowly, they may not receive enough moisture and may dry out before they can germinate. In addition, shallow planting can make the seedlings weak and prone to falling over or being damaged by pests.
Tips for Planting Okra Seeds at the Correct Depth
To ensure that your okra seeds are planted at the correct depth, follow these tips:
- Use a ruler or seed spacer to measure the depth and spacing of your okra seeds.
- Water the soil lightly before planting to help settle it and create a moist environment for the seeds.
- Plant the seeds in well-draining soil that is rich in organic matter.
- After planting, cover the seeds with a light layer of soil and press down gently to ensure good soil-to-seed contact.
- Water the seeds lightly to ensure the soil remains moist but not waterlogged.
- Monitor the soil moisture and water to keep the seeds and seedlings hydrated.
By following these tips, you can ensure that your okra seeds are planted at the correct depth and will germinate successfully.
How Often Should Okra Seeds Be Watered?
Watering is a crucial aspect of growing okra from seed. However, knowing how often to water the seeds can be difficult, especially for new gardeners.
Watering Frequency for Okra Seeds
Okra seeds should be watered regularly but not excessively. The goal is to keep the soil moist but not waterlogged, as too much water can cause the roots to rot before germinating.
It is essential to keep the soil consistently moist during germination, which typically lasts between 7 and 14 days. Depending on the weather and soil conditions, this may require watering daily or every other day.
Once the seedlings have emerged and have developed their first true leaves, they can be watered less frequently. Aim to water deeply once weekly rather than giving shallow watering more often. This will encourage the plants to develop deep roots and become more drought-tolerant.
Signs that Okra Seeds Need Watering
Several signs can indicate that okra seeds need watering. Some of these signs include:
- The soil feels dry to the touch: Stick your finger into the ground near the seed and feel for moisture. If the soil feels dry, it is time to water.
- The seedlings are wilting: If the leaves of the seedlings are drooping or sagging, this may indicate that they are not getting enough water.
- The soil has pulled away from the edges of the container: If you are growing okra seeds in a container, check to see if the ground has pulled away from the sides of the container. This can be a sign that the soil is dry and needs watering.
Tips for Watering Okra Seeds
To ensure that your okra seeds are getting the right amount of water, follow these tips:
- Water the seeds lightly after planting to settle the soil and create a moist environment.
- Water regularly during the germination period to keep the soil consistently moist.
- Once the seedlings have emerged, water deeply once a week rather than giving shallow watering more frequently.
- Use a watering can or a drip irrigation system to water at the base of the plants rather than overhead.
- Avoid watering during the hottest part of the day, as this can cause the water to evaporate too quickly and may lead to leaf burn.
By following these tips, you can ensure that your okra seeds are getting the right amount of water and will grow into healthy, productive plants as you learn how to grow okra from seed.
How Do I Prepare the Soil for Planting Okra Seeds?
Preparing the soil is an essential step in growing okra from seed. Proper soil preparation improves drainage, provides nutrients, and ensures healthy plant growth.
Choosing the Right Location for Okra
Before preparing the soil, choosing the right location for your okra plants is essential. Okra prefers full sun and well-draining soil that is rich in organic matter. Choose a location that receives at least 6-8 hours of direct sunlight daily, and avoid planting in low-lying areas where water may accumulate.
Testing the Soil
Before planting, testing the soil's pH and nutrient levels is a good idea. This can be done with a soil test kit or by sending a sample to a testing laboratory. The test results will help you determine what amendments may be needed to improve the soil quality for okra.
Soil Amendments for Okra
Depending on the results of the soil test, several amendments can be used to improve the soil quality for okra:
- Compost: Adding compost to the soil can improve its texture and provide essential nutrients for plant growth.
- Perlite or Vermiculite: Adding perlite or vermiculite to the soil can improve drainage and aeration.
- Organic Fertilizer: Adding an organic fertilizer, such as composted manure or bone meal, can provide additional nutrients for plant growth.
- Lime: Adding lime can raise the pH of acidic soil, which is beneficial for okra.
- Sulfur: Adding sulfur can lower the pH of alkaline soil, which is useful for okra.
Steps for Preparing the Soil
To prepare the ground for planting okra seeds, follow these steps:
- Clear the area of any debris, rocks, or weeds.
- Loosen the dirt to a depth of 12-18 inches with a garden fork or tiller.
- Add any necessary amendments based on the results of the soil test.
- Mix the amendments into the soil to ensure they are evenly distributed.
- Smooth the soil surface with a rake.
- Water the soil lightly to settle it and create a moist environment for the seeds.
Following these steps, you can prepare the soil for planting okra seeds and ensure the plants have the necessary nutrients and conditions to grow and thrive.
Seed Safe Survival Seed Kit - 35 Variety Pack

$29.95
$49.95
Seed Safe Survival Seed Kit: The Ultimate Heirloom Collection for Self-Sufficient Gardening Introducing the Seed Safe - 35 Varieties of Heirloom Vegetable, Herb, and Fruit Seeds, the ultimate solution for gardeners who want to secure a bountiful future harvest. This… read more
How Do I Thin Okra Seedlings?
Thinning is an essential step in growing okra from seed. Thinning involves removing weaker or overcrowded seedlings to allow the remaining seedlings to grow and develop properly. We will discuss how to thin okra seedlings and why it is essential for the health of plants.
Why Thin Okra Seedlings?
Thinning okra seedlings is essential for several reasons:
- It prevents overcrowding: If too many seedlings are planted in one area, they may compete for resources and not receive enough water or nutrients.
- It promotes more robust plants: Removing weaker seedlings allows the remaining plants to develop stronger roots and become more resilient to pests and disease.
- It improves air circulation: Thinning allows for better air circulation around the plants, which can help prevent fungal diseases.
When to Thin Okra Seedlings
Okra seedlings should be thinned when they are 2-3 inches tall and have developed their first true leaves. At this point, it is easier to see which seedlings are weaker or overcrowded.
How to Thin Okra Seedlings
To thin okra seedlings, follow these steps:
- Gently remove the weaker seedlings by pulling them out at the base of the stem. Be careful not to damage the roots of the remaining seedlings.
- Space the remaining seedlings 18-24 inches apart to ensure good air circulation and prevent overcrowding.
- Water the seedlings lightly after thinning to help them recover from the stress of transplanting.
Tips for Thinning Okra Seedlings
To ensure the successful thinning of your okra seedlings, follow these tips:
- Use clean, sharp scissors or pruning shears to thin seedlings if they are too close to each other.
- Avoid thinning during the hottest part of the day, as this can stress the seedlings.
- Be gentle when removing seedlings to avoid damaging the roots of the remaining plants.
By thinning okra seedlings, you can improve your plants' health and productivity, ensuring they have the space and resources they need to grow and thrive.
How Do I Transplant Okra Seedlings?
Transplanting is an essential step in the process of growing okra from seed. Transplanting involves moving seedlings from their initial growing location to their permanent place in the garden.
When to Transplant Okra Seedlings
Okra seedlings should be transplanted when they are 4-6 weeks old and have developed several true leaves. They should be at least 4 inches tall and have a robust and healthy stem.
Choosing a Transplant Location
When choosing a location for transplanting your okra seedlings, consider the following factors:
- Sunlight: Okra requires full sun to grow and produce fruit. Choose a location that receives at least 6-8 hours of direct sunlight daily.
- Soil: Okra prefers well-draining soil that is rich in organic matter. Choose a location with fertile, well-draining soil prepared with compost and other amendments as needed.
- Water: Okra requires regular watering to thrive. Choose a location with easy access to a water source.
- Space: Okra plants can grow up to 6 feet tall and 3 feet wide. Choose a location with enough space to accommodate the mature size of the plants.
Steps for Transplanting Okra Seedlings
To transplant okra seedlings, follow these steps:
- Choose a cloudy day or transplant in the early morning or late afternoon to avoid stressing the seedlings with direct sunlight.
- Dig a hole in the transplant location that is deep enough to accommodate the entire root system of the seedling.
- Gently remove the seedling from its original growing container, careful not to damage the roots.
- Place the seedling in the hole and backfill it with soil, gently pressing down to ensure the ground is in contact with the roots.
- Water the seedling thoroughly to help it settle into its new location.
How Do I Care for Okra Seedlings After Transplanting?
Caring for okra seedlings after transplanting is essential in ensuring their success in the garden. This article will discuss how to care for okra seedlings after transplanting, including watering, fertilizing, and pest management.
Watering Okra Seedlings
After transplanting, it is essential to water okra seedlings regularly to help them establish their root system in their new location. Water the seedlings deeply once a week rather than giving shallow watering more frequently. This will encourage the plants to develop deep roots and become more drought-tolerant.
Monitor the soil moisture and water as needed to keep the seedlings hydrated, but be careful not to overwater, as this can lead to root rot.
How Do I Prevent Pests and Diseases When Growing Okra From Seed?
Pests and diseases can be a challenge when growing okra from seed, but there are steps you can take to prevent them and keep your plants healthy.
Common Pests That Affect Okra Seedlings
Some common pests that can affect okra seedlings include:
- Aphids: These tiny, soft-bodied insects feed on the sap of plants and can cause stunted growth, deformed leaves, and the spread of viruses.
- Cutworms: These caterpillars feed on the stems of young seedlings, cutting them off at the soil line and killing the plants.
- Flea beetles: These small, jumping beetles feed on the leaves of seedlings, causing small holes and damage to the foliage.
Common Diseases That Affect Okra Seedlings
Some common diseases that can affect okra seedlings include:
- Damping-off: This fungal disease can cause seedlings to wilt and die suddenly. It is often caused by overwatering or poor drainage.
- Fusarium wilt: This fungal disease causes yellowing and wilting of the leaves and stems and can eventually kill the plant.
- Root rot: This fungal disease can cause the roots to rot and the plant to wilt and die.
Preventing Pests and Diseases in Okra Seedlings
To prevent pests and diseases in your okra seedlings, follow these tips:
- Keep the growing area clean and free of debris, weeds, and other plants that may harbor pests or diseases.
- Use clean pots, tools, and equipment to avoid introducing pests and diseases into your growing area.
- Monitor your plants regularly for signs of pests or diseases, and take action immediately if you notice any problems.
- Water your plants carefully, avoiding overwatering and ensuring good drainage to prevent fungal diseases.
- To control pests, use natural pest control methods, such as beneficial insects or organic pesticides.
- Rotate your crops each year to avoid the buildup of soil-borne diseases.
Treating Pests and Diseases in Okra Seedlings
If you notice pests or diseases in your okra seedlings, immediately prevent them from spreading. Here are some treatment options:
- For aphids, use soapy water or neem oil to kill the insects.
- For cutworms, use a collar around the base of the plant to prevent the caterpillars from crawling up the stem.
- For flea beetles, use a floating row cover to prevent the beetles from reaching the plants.
- For damping-off, improve drainage and reduce watering to prevent the fungus spread.
- For fusarium wilt and root rot, remove infected plants and avoid planting in the exact location for several years.
By following these tips and taking action promptly if pests or diseases occur, you can prevent and treat joint issues when growing okra from seed.
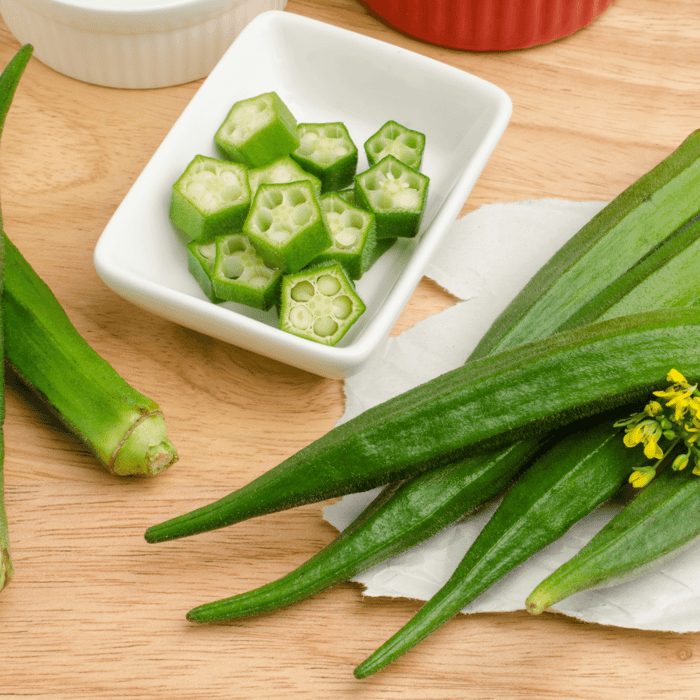
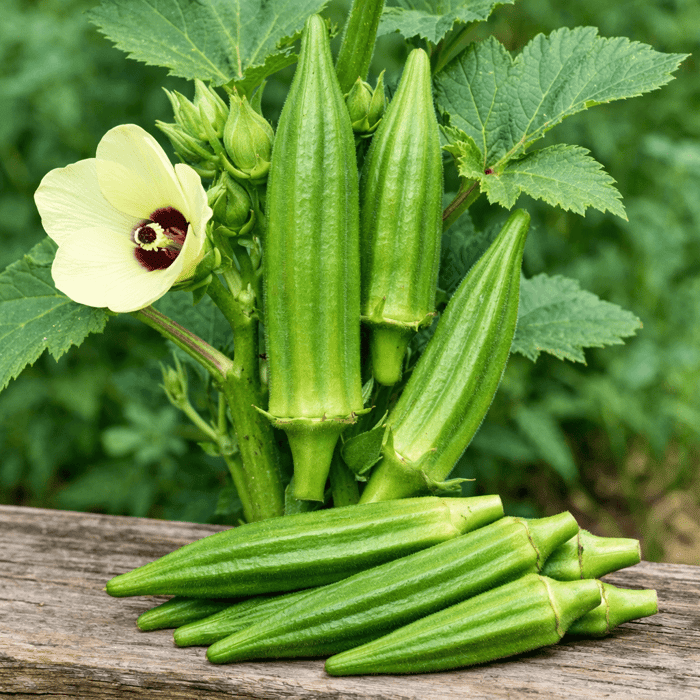
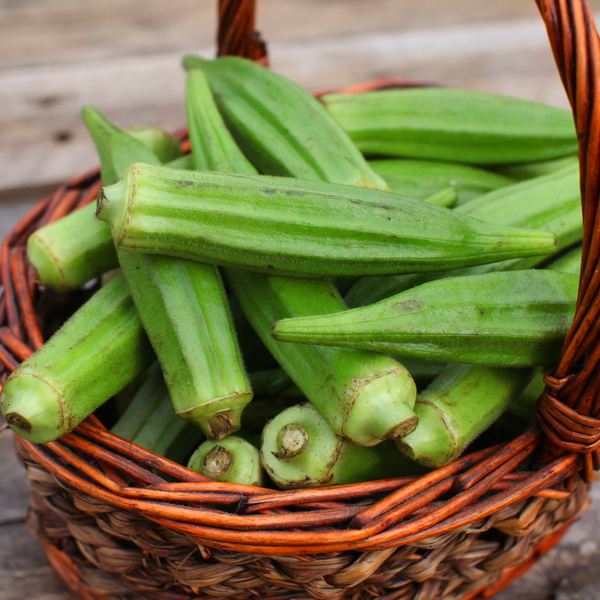
How Do I Harvest Okra?
Harvesting okra is an exciting part of growing okra from seed, as it is the culmination of weeks of hard work and patience. This article will discuss when your okra is ready to harvest and how to harvest it properly.
When to Harvest Okra
Okra should be harvested when the pods are 2-4 inches long and tender. If left on the plant too long, the pods can become rigid and woody, making them difficult to eat.
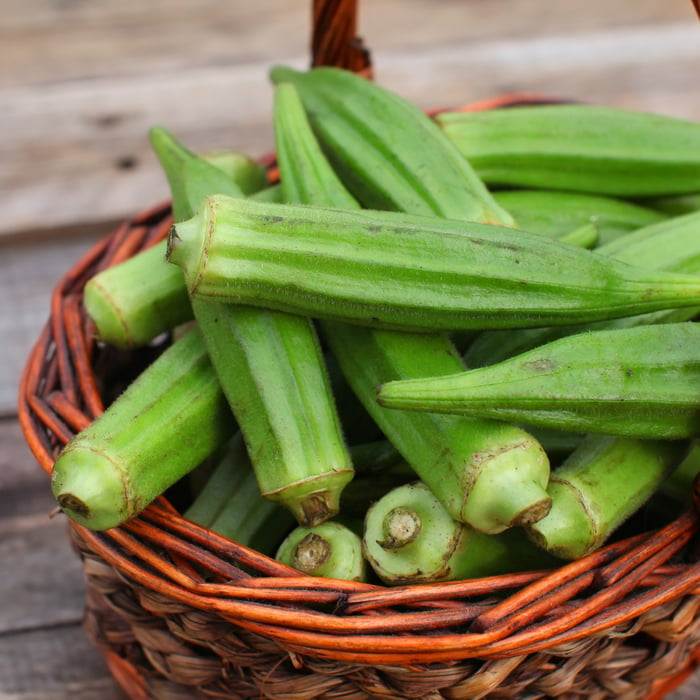
Harvest okra every 2-3 days to ensure that the pods are picked at the right stage of maturity.
How to Harvest Okra
To harvest okra, follow these steps:
- Wear gloves to protect your hands from the spines on the plant.
- Look for pods that are 2-4 inches long and still tender.
- Use a sharp knife or pruner to cut the pods from the plant, not damaging the stem or the other pods.
- Place the harvested okra in a basket or container, being careful not to stack the pods on top of each other, as this can cause them to become misshapen.
Tips for Harvesting Okra
To ensure successful harvests of your okra, follow these tips:
- Harvest okra every 2-3 days to ensure that the pods are picked at the right stage of maturity.
- Use gloves to protect your hands from the spines on the plant.
- Cut the pods from the plant with a sharp knife or pruners, not damaging the stem or other pods.
- Don't let the pods grow too large or become tough and woody, as this will make them difficult to eat.
Following these tips and harvesting your okra regularly, you can enjoy a bountiful harvest of this delicious and nutritious vegetable.
Clemson Spineless Okra Seeds
$2.49
Clemson Spineless Okra Seeds - Heirloom, Non-GMO, Non-Hybrid, Open-Pollinated for Your Garden Discover the timeless appeal of Clemson Spineless Okra seeds, a must-have addition for gardeners looking to grow a bountiful harvest of tender, flavorful okra pods. Our premium seeds… read more
Conclusion
Growing okra from seed can be a fun and rewarding experience as long as you follow the proper steps and take care to meet the needs of your plants. By choosing the right seeds, providing the right growing conditions, and preventing and treating pests and diseases, you can enjoy a bountiful harvest of delicious okra pods.
Remember to keep your plants healthy and well-maintained throughout the growing season and to harvest your okra regularly to ensure that the pods are picked at the right stage of maturity. You can enjoy growing your own delicious okra from seed with patience and care. Now that you know how to grow okra from seed, will you include okra in your garden this year?
Stop by our online shop and pick up your heirloom okra seeds today!
FAQ's
Q: When is the best time to plant okra seeds?
A: Okra seeds should be planted in the spring once the soil temperature reaches at least 65°F (18°C) or higher. In most areas, this will be around mid-April to early May.
Q: How do I prepare the soil for planting okra seeds?
A: Okra prefers well-draining soil with a pH between 6.0 and 6.8. Work in compost or well-rotted manure to improve soil quality and add slow-release fertilizer.
Q: How deep should I plant the okra seeds?
A: Plant the seeds about 1 inch deep and 2-3 inches apart. Cover with soil and water gently.
Q: How often should I water my okra seeds?
A: Keep the soil moist but not waterlogged. Water the seeds gently every day or every other day, depending on weather conditions.
Q: How long does it take for okra seeds to germinate?
A: Okra seeds typically germinate in 7-14 days.
Q: When should I thin my okra seedlings?
A: Thin your okra seedlings once they reach about 4 inches tall. Space them about 12-18 inches apart to give them room to grow.
Q: How much sun do okra plants need?
A: Okra plants need full sun, which means at least 6 hours of direct sunlight daily.
Q: How often should I fertilize my okra plants?
A: Apply a balanced fertilizer (s0-10-10) every 4-6 weeks throughout the growing season.
Q: When should I harvest my okra pods?
A: Harvest your okra pods when they are 3-4 inches long. Pick them regularly to encourage more growth.
Q: What are some common problems when growing okra from seed?
A: Common problems include damping off (a fungal disease), insect pests (such as aphids or stink bugs), and poor fruit set (which can be caused by high temperatures or lack of water).