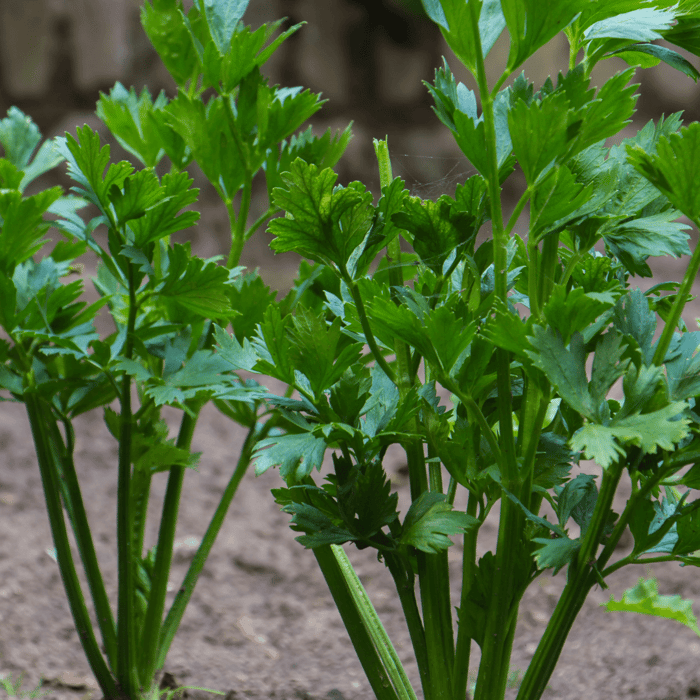

Growing celery from seed is a rewarding challenge for gardeners who love crisp, flavorful stalks grown right at home. Among the many varieties available today, Celery UT 52-70 stands out for its strong performance, classic flavor, and dependable yields. It has become a favorite among gardeners who want a reliable heirloom celery variety that thrives in both backyard gardens and raised beds. If you want to learn how to grow Celery UT 52-70 from seed successfully, this guide walks you through everything you need to know, from germination to harvest.
Whether you are planting in containers, raised beds, or a traditional garden, following the right steps can make all the difference. Celery has a reputation for being slow to start, but once it becomes established, it rewards you with crisp stalks perfect for soups, salads, juices, and snacking. Below you will find practical instructions, helpful tips, and essential timing advice to help you raise your best celery crop yet.
What Makes Celery UT 52-70 Special
Celery UT 52-70 is known for its uniform plants, crunchy green stalks, and delicious flavor. Many gardeners choose this variety because it is dependable and has excellent texture when fully mature. It also tolerates cooler temperatures better than some other celery types, which is useful if you live in an area with unpredictable springs.
Key features of Celery UT 52-70 include:
Crisp, tender stalks with great flavor
Consistent growth habit
Performs well in home gardens and market gardens
Suitable for fresh eating, cooking, dehydrating, and freezing
Heirloom, non hybrid, open pollinated and non GMO when purchased from high quality suppliers
Because celery takes time to mature, selecting a reliable variety is important. UT 52-70 delivers results when given proper care and the right growing conditions.
Utah 52-70 Celery Seeds

$2.49
Introducing the premium Utah 52-70 Celery Seeds for Planting, your perfect choice for growing luscious, crisp, and nutritious celery in your home garden. Specially selected for their superior quality, these seeds will provide you with an exceptional gardening experience, ensuring… read more
Starting Celery UT 52-70 From Seed: Timing Matters
Celery is a long season crop with a slow germination period. To grow Celery UT 52-70 successfully, you will want to start seeds indoors well before your last frost date. The ideal time to start is 10 to 12 weeks before your area’s final spring frost.
Celery seeds need warmth, moisture, and patience. They can take two to three weeks to germinate, which is completely normal. Staying consistent with watering and temperature is the key to good germination.
Ideal germination conditions:
Soil temperature: 70 to 75 degrees Fahrenheit
Light seed coverage, since celery needs some light exposure to germinate
Keep soil evenly moist but not waterlogged
Bottom watering helps prevent soil crusting and keeps seeds in place
If you live in a cooler climate or have a short growing season, starting early is essential. Since Celery UT 52-70 takes time to develop thick, delicious stalks, an early indoor start sets your plants up for the best possible harvest.
Preparing Your Seed Starting Mix
Because celery seeds are tiny, a fine textured seed starting mix is best. Use a loose, sterile, peat or coco based mix that retains moisture but drains well. Avoid heavy garden soil for seed starting because it compacts easily and can inhibit germination.
Before sowing seeds, moisten your mix so it is damp but not dripping wet. Fill seed trays or small cell packs and press lightly to remove air pockets. Sprinkle celery seeds on the surface and cover with no more than a thin dusting of soil. Remember that too much coverage can prevent germination.
A humidity dome can help maintain even moisture and warmth. Remove it once seedlings begin emerging.
Light Requirements for Celery Seedlings
After your Celery UT 52-70 seedlings sprout, they will need plenty of light to grow strong and upright. Without enough light they will become leggy and weak.
Provide:
12 to 16 hours of bright light per day
Grow lights set two to four inches above seedlings
A sunny south facing window if you are not using artificial lights
Rotate trays regularly to encourage even growth. Celery seedlings grow slowly in the early stages, so do not worry if they seem small at first.
Transplanting Celery Outdoors
Once seedlings have grown several true leaves and outdoor temperatures are consistently above freezing, you can begin preparing for transplanting. Celery prefers cool weather but cannot tolerate hard frost. The best time to transplant is two to three weeks before your last expected frost, after hardening off your seedlings.
How to Harden Off Celery Seedlings
Hardening off is the process of gradually getting indoor seedlings accustomed to outdoor conditions.
Start with one to two hours outside in a sheltered location
Increase exposure each day
After a week, seedlings should be able to handle full days outdoors
This reduces transplant shock and encourages stronger root systems.
Soil and Spacing
Celery thrives in nutrient rich, moisture retaining soil. Amend your garden bed with compost before planting for best results.
Plant spacing: 8 to 10 inches apart
Row spacing: 12 to 18 inches
Plant celery slightly deeper than it was growing in the seed tray for a sturdier base
Consistent moisture is especially important for celery. Mulching around plants can help regulate soil temperature and reduce evaporation.
How to Care for Celery UT 52-70 Throughout the Season
Celery requires consistent attention, especially in the early months. With steady watering, proper feeding, and good soil, your plants will reward you with crisp, flavorful stalks.
Watering
Celery has shallow roots and needs frequent watering to maintain tender stalks. Aim for:
Even, consistent soil moisture
Avoid letting the soil dry out completely
Drip irrigation or soaker hoses are ideal for raised beds and garden rows
Water stress can cause stalks to become tough or bitter, so consistency is key.
Fertilizing
Celery is a heavy feeder. Incorporate compost into the soil at planting time, then provide additional nutrients throughout the season.
Use:
A balanced organic fertilizer every 3 to 4 weeks
Liquid seaweed or fish emulsion for gentle feeding
Side dressing with compost halfway through the season
Nitrogen is especially helpful for strong stalk development, but avoid over fertilizing to prevent weak or floppy growth.
Sunlight
Celery grows best with full sun but can tolerate partial shade, especially in areas with hot summers. Provide at least 6 hours of sunlight per day for best yields.
Blanching (Optional)
Some gardeners blanch celery to create paler, more tender stalks. This is optional for UT 52-70, but if you prefer mild celery you can mound soil or wrap cardboard around the stalks two weeks before harvest.
Common Problems When Growing Celery and How to Avoid Them
Celery is not the easiest crop for beginners, but understanding potential problems helps you prevent them.
Slow or Poor Germination
Celery naturally takes time to sprout, but low temperatures or too much soil on top can delay germination. Keep seeds warm and lightly covered to improve success.
Bitter Stalks
Usually caused by irregular watering or high heat. Mulching and consistent irrigation help maintain flavor.
Pests
Aphids, slugs, snails, and leaf miners are the most common pests. Use row covers early in the season or treat with natural solutions like neem oil if pests become an issue.
Bolting
Celery may bolt if exposed to cold temperatures after transplanting. Hardening off properly reduces this risk.
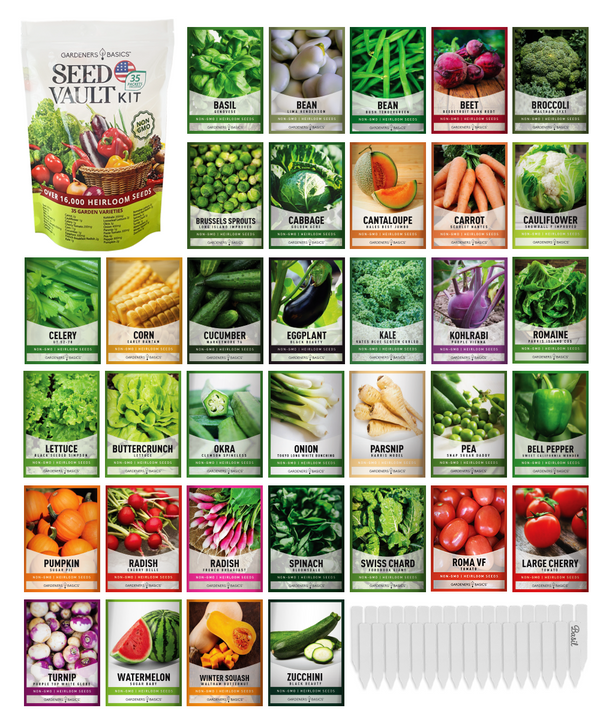
Vegetable Seed Vault Kit – 35 Heirloom Non-GMO Vegetable Seeds for Gardening & Survival Food Storage
$29.95
$49.95
Vegetable Seed Vault Kit – 35 Heirloom Non-GMO Vegetable Seeds The Vegetable Seed Vault Kit includes 35 heirloom, non-GMO vegetable seed varieties with over 16,000 seeds, making it a complete survival seed vault for home gardening, food security, and long-term… read more
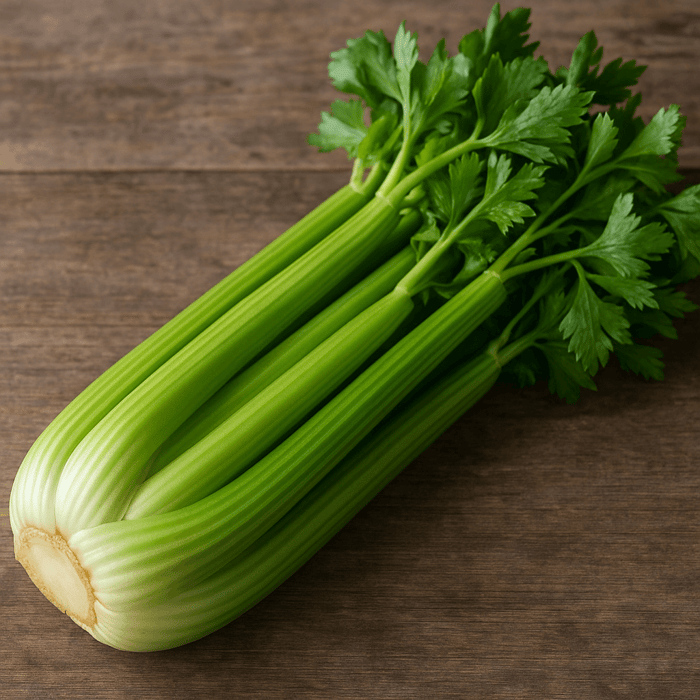
When to Harvest Celery UT 52-70
Celery UT 52-70 typically matures in about 100 to 120 days from transplanting. Harvest time can vary depending on weather and care. You will know it is ready when the stalks are thick, firm, and tall.
You can harvest:
Whole plants by cutting at the base
Individual stalks as needed throughout the season
For the best flavor, water well before harvest. Fresh, homegrown celery tastes noticeably better than store bought varieties and has superior texture.
Final Thoughts: Why Celery UT 52-70 Is Worth Growing
Growing celery from seed requires patience, but the results are worth the effort. Celery UT 52-70 offers exceptional flavor and steady performance when provided with the right care. Starting seeds early, giving seedlings plenty of light, and maintaining consistent moisture are the most important steps for success.
This heirloom variety is perfect for gardeners who want crisp, flavorful celery that grows beautifully in backyard gardens and raised beds. With the steps above, you can grow a thriving crop that enhances your kitchen, your garden, and your confidence in raising more challenging vegetables from seed.
If you want premium quality celery seeds, explore the selection at Gardeners Basics, where we offer heirloom, non GMO, open pollinated seeds designed for strong germination and dependable results. Your next celery harvest starts with a single seed, and UT 52-70 is an excellent choice for gardeners of all experience levels.